
In the world of comfort food, few dishes evoke warmth and satisfaction quite like a steaming bowl of ramen. But beyond the fragrant broth and colorful toppings lies an frequently enough-overlooked hero: the noodles themselves. Crafting homemade ramen noodles is more than just a cooking task-it’s an artful journey into texture, technique, and tradition. From mixing the perfect dough to achieving that ideal chew, making noodles by hand transforms a simple meal into a sensory experience. Join us as we unravel the secrets behind these delicate strands and embark on a flavorful journey that brings authentic ramen right to yoru kitchen.
Selecting the Perfect Flour for Authentic ramen Texture
Crafting homemade ramen noodles starts with choosing the flour that will define their unmistakable bite and chew. Customary ramen flour typically has a high protein content, around 11-13%, which allows the dough to develop the strong gluten network crucial for that delightfully springy texture. Japanese “ramen” or “all-purpose” flour is ideal but can be hard to find outside specialty stores.A blend of high-gluten bread flour and pastry flour offers a splendid balance: bread flour provides strength and chew, while pastry flour can soften the texture slightly for a less dense noodle.
Experimental bakers often incorporate a small percentage of l kansui-an alkaline mineral water or substitute like baking soda-to give the noodles their subtle yellow tint and unique elasticity. Using such flour and additives carefully will create strands that hold broth admirably without turning mushy or brittle.
Mastering Dough Preparation Techniques for Ideal Noodle Consistency
Getting the dough right is the heartbeat of ramen noodles. Start by mixing your flour blend with cold water and your alkaline agent slowly, allowing the flour to hydrate evenly. This prevents tough spots and ensures uniform dough elasticity. Knead the dough on a lightly floured surface for about 8-10 minutes until it feels firm but pliable – not sticky. This step develops essential gluten chains that deliver ramen’s signature chewy resilience.
After kneading, wrap the dough tightly and rest it for at least 1 hour in the fridge. resting allows the gluten to relax, making the dough easier to roll out without springing back stubbornly during the next steps. When ready, gently press the dough into a rough rectangle and prepare for rolling.
Shaping and Cutting Tips to Elevate Your Homemade Ramen Experience
Once rested, roll the dough out evenly to a thickness of about 1.5 to 2 millimeters – thin enough to cook quickly but thick enough to retain bite. Dust both sides with flour frequently to prevent sticking without adding excess flour that could dry the dough. For classic straight ramen noodles, fold the sheet multiple times (dusting between layers) and use a sharp knife or pasta cutter to slice noodles about 2 to 3 millimeters wide.
For a visually dynamic bowl, consider hand-pulling noodles or cutting at slight angles for more rustic strands. As you separate noodles,shake off excess flour and toss lightly in a little cornstarch or potato starch to keep strands from sticking during boiling and assembly.
Essential Broth Pairings That Complement Your Handmade Noodles
delicious ramen noodles demand equally thoughtful broths to complete the harmony of textures and flavors.A clear shoyu broth with umami-packed soy sauce works beautifully with your springy noodles,accentuating depth without overwhelming. For a creamier experience,vegetable-based miso broths provide richness and sweet earthiness that pairs impeccably with the chew of homemade ramen noodles.
For an extraordinary touch,infuse your broth with kombu and shiitake mushrooms,creating subtle layers of umami that envelop every bite. The noodles, having just enough heft, soak up the broth’s essence yet never lose their beloved texture.Remember, homemade ramen noodles can elevate simple broths into unforgettable meals – so balance seasoning carefully to allow your fresh noodles to shine.
Prep and Cook Time
- Prep Time: 30 minutes
- Resting Time: 1 hour
- Cook Time: 3-4 minutes
Yield
Serves 4 generous portions
Difficulty Level
Medium - requires basic dough handling and rolling skills
Ingredients
- 2 cups high-gluten bread flour, sifted
- 1 cup pastry flour, sifted
- 1 teaspoon baking soda (oven-baked to replicate kansui effect)*
- 1 cup cold water
- 1 teaspoon salt
- Cornstarch or potato starch for dusting
*To convert baking soda for alkaline noodles, bake at 250°F for 1 hour until golden, then cool.
Instructions
- Preheat your oven to 250°F (120°C).Spread the baking soda evenly on a baking sheet and bake for 1 hour to create a mild alkaline agent. Cool entirely.
- In a large bowl, combine the sifted bread and pastry flours with the salt and cooled baking soda powder.
- Slowly add cold water to the flour mixture, stirring with chopsticks or a fork to combine as evenly as possible.
- Use your hands to bring the shaggy dough together. Transfer to a lightly floured surface and knead firmly for 8-10 minutes until smooth and elastic. Avoid adding extra flour during kneading unless necessary to prevent sticking.
- Wrap dough tightly in plastic wrap and refrigerate for at least 1 hour to relax gluten.
- Lightly dust your rolling surface and rolling pin with flour.Roll dough into a rectangle about 1.5-2 mm thick, frequently turning and dusting to prevent sticking.
- Fold the rolled dough into thirds or fourths, dusting between layers, then slice noodles 2-3 mm wide with a sharp knife.
- Gently unwind noodles and toss in a little cornstarch or potato starch to prevent sticking.
- Bring a large pot of water to a rolling boil. Add noodles carefully and cook for 3-4 minutes until just tender but still chewy.Stir gently to prevent clumping.
- Drain noodles and rinse briefly under cold water to stop cooking and enhance chewiness. Serve instantly in your chosen broth.
Chef’s Notes
- Adjust water quantity slightly depending on humidity and flour brand. The dough should be firm but not dry or crumbly.
- For a vibrant golden hue and authentic texture, using true kansui (alkaline water) is ideal if available.
- Rolling thinly is key-thicker noodles risk becoming gummy when cooked.
- Make-ahead tip: Dough can be refrigerated up to 24 hours wrapped tightly or frozen up to 1 month.
- Experiment with noodle thickness and width to match your broth type for perfect balance.
Serving suggestions
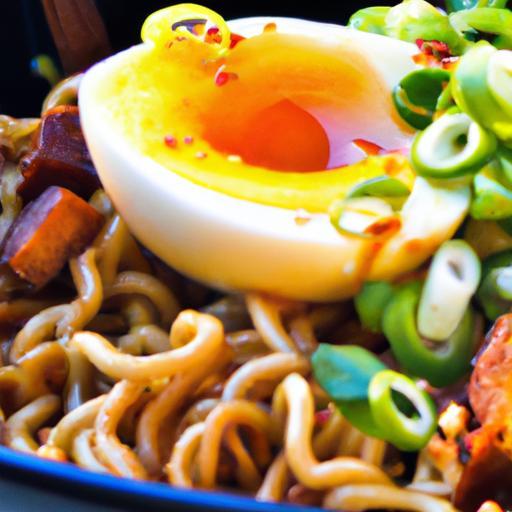
Place your freshly cooked ramen noodles in a bowl of steaming broth, then build layers with crisp blanched greens like baby bok choy or spinach. Top with sliced scallions, bamboo shoots, soft boiled egg halves, and a drizzle of toasted sesame oil. A sprinkle of toasted nori flakes or chili threads adds textural contrast and visual flair. Serve alongside pickled ginger or a light soy-sesame dipping sauce to elevate each bite.

| Nutrient | Per serving |
|---|---|
| Calories | 280 kcal |
| Protein | 9 g |
| Carbohydrates | 56 g |
| Fat | 1 g |
For an in-depth guide on complementary broth recipes, check out our vegetarian Ramen Broth Recipes. Learn more about the science behind alkaline noodles at the ScienceDirect Food Chemistry Journal.
Q&A
Q&A: Crafting Homemade Ramen Noodles – A Flavorful Journey
Q1: What makes homemade ramen noodles different from store-bought ones?
A1: Homemade ramen noodles possess a unique texture and freshness that’s hard to replicate with store-bought varieties. When you craft your own noodles, you control the thickness, chewiness, and flavor, resulting in a bowl that feels personal and vibrant. The process connects you deeply with the tradition and craft behind every slurp-worthy strand.
Q2: What are the key ingredients for traditional ramen noodles?
A2: The foundation of ramen noodles includes high-gluten wheat flour, water, salt, and kansui-an alkaline mineral water that gives noodles their characteristic yellow tint and springy bite. The magic of kansui is essential, as it transforms simple dough into the iconic ramen texture.
Q3: Can I substitute kansui if it’s hard to find?
A3: Absolutely! If kansui isn’t readily available, you can make a homemade substitute using baking soda. Baking soda baked in the oven until crisp can mimic the alkaline effect, giving your noodles that desirable chew and color. It’s a handy trick for adventurous cooks on a budget.
Q4: How crucial is kneading in making ramen noodles?
A4: Kneading is crucial-it develops the gluten network that forms the chewy backbone of ramen noodles. Proper kneading transforms a sticky mixture into a smooth, elastic dough ready to hold up in boiling broth.Aim for about 10-15 minutes of kneading by hand, or use a stand mixer for efficiency.
Q5: What’s the best way to roll out ramen dough?
A5: Roll the dough evenly and thinly-around 1-2 millimeters thick. Use a pasta machine if you have one, gradually decreasing thickness settings for a smooth, consistent sheet. If rolling by hand, patience and light flour dusting help prevent sticking while achieving a silky finish.
Q6: How can I cut the noodles without a specialized tool?
A6: No fancy noodle cutter? No problem! Sharp kitchen knives work well when used carefully.Fold the dough sheet lightly and slice into uniform strips, aiming for about 2-3 millimeters in width.Alternatively, use kitchen scissors for a rustic, charming effect.
Q7: Once cut, how should I cook the noodles?
A7: Fresh ramen noodles cook quickly-typically 1 to 2 minutes in boiling water. Watch closely to avoid overcooking and losing that perfect chew. Drain carefully and rinse with cold water if you’re preparing them in advance; this stops the cooking and prevents sticking.
Q8: What are some exciting broth bases to pair with homemade ramen noodles?
A8: the sky’s the limit! Vegetable-rich miso broth, savory chicken-based broth, or a vibrant mushroom umami broth all create stunning companions for your noodles. You can layer flavors with garlic, ginger, scallions, and seaweed to build complexity without ever relying on pork.
Q9: Can I infuse the noodles themselves with flavor?
A9: Definitely! Incorporate spinach or carrot purée into the dough for color and a subtle taste. Adding toasted sesame seeds or finely chopped herbs can also add character. Just remember to adjust the liquid in your dough recipe when adding purées to keep the texture balanced.
Q10: What toppings best complement homemade ramen noodles?
A10: Fresh toppings elevate the entire bowl. Consider soft-boiled eggs marinated in soy and mirin, crunchy bamboo shoots, sautéed shiitake mushrooms, crisp nori sheets, fresh scallions, and a drizzle of chili oil for heat. Each bite becomes a multi-textured delight.
Q11: How long can I store homemade ramen noodles?
A11: Fresh noodles are best enjoyed within a day or two when stored wrapped tightly in the refrigerator. For longer storage, freeze them on a tray before transferring to a sealed bag. When cooking from frozen, add a minute or so to the boiling time for perfect results.Q12: What’s the most rewarding part of making ramen noodles from scratch?
A12: Beyond the delicious outcome, it’s the mindful connection to a culinary tradition that spans generations.The tactile satisfaction of kneading, rolling, and cutting-paired with the joyful anticipation of a steaming bowl-makes homemade ramen a flavorful journey worth savoring.
Embarking on homemade ramen noodle-making awakens both creativity and appreciation for this beloved dish. Each step transforms humble ingredients into something exceptional-a true celebration of flavor and craft.
Insights and Conclusions
As the final strands of your homemade ramen noodles slide into the savory broth, you’ll realize that this culinary journey is as much about patience and technique as it is indeed about flavor. Crafting ramen from scratch transforms simple ingredients into an art form-each batch a testament to your dedication and creativity. Whether you savor the chewy texture or the rich aroma that fills your kitchen, making homemade ramen is a rewarding adventure that invites you to explore endless variations and personal twists. So, roll up your sleeves, embrace the process, and let every bowl tell the story of your flavorful journey into the heart of one of japan’s most beloved dishes.