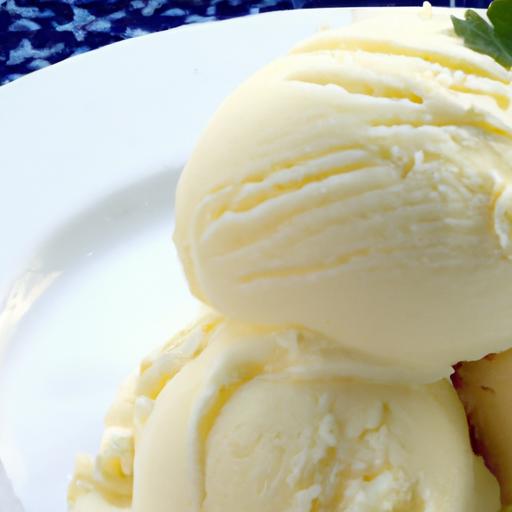
There’s something irresistibly magical about a scoop of velvety vanilla ice cream-the way it melts on your tongue, releasing delicate floral notes and creamy richness that transport you to summer memories and cozy moments alike. While store-bought tubs offer convenience, nothing quiet compares to the luscious texture and pure flavor of homemade vanilla ice cream crafted with care. in this article,we’ll dive into the art and science of creating the creamiest,most indulgent vanilla ice cream right in your own kitchen-no fancy equipment required. Get ready to awaken your taste buds and elevate a timeless classic into an unforgettable delight.
crafting the Creamiest Homemade Vanilla Ice Cream Delight begins with a dedication to selecting top-tier ingredients and mastering each step that transforms simple components into a luscious, silky dessert. The magic lies not only in the flavors but in the textures that whisper indulgence with every spoonful. As someone who has journeyed through countless custard experiments, I have discovered that true decadence starts with choosing the purest vanilla beans and freshest dairy and is perfected through precise technique and gentle patience.
Prep and Cook Time
- Preparation: 20 minutes
- Cook (Custard Base): 15 minutes
- Chilling: 4 hours (minimum)
- Churning: 25-30 minutes
Yield
Approximately 1 quart (4 generous servings)
Difficulty level
medium - Ideal for those cozy with stove-top custard and ice cream makers
Ingredients
- 2 cups heavy cream, cold
- 1 cup whole milk, cold
- ¾ cup granulated sugar
- 5 large egg yolks (preferably pasture-raised)
- 1 vanilla bean pod, split and seeds scraped (or 2 teaspoons pure vanilla extract)
- Pinch of fine sea salt
Instructions
- infuse the cream: In a medium saucepan, combine the heavy cream, milk, and the split vanilla bean pod with its seeds. Warm over medium heat just until it starts to steam and tiny bubbles form around the edge – about 5 minutes. Remove from heat, cover, and let it infuse for 30 minutes to deepen the vanilla aroma.
- Whisk the yolks with sugar: While waiting, in a heatproof bowl, vigorously whisk the egg yolks with the sugar and pinch of salt until the mixture is pale yellow and slightly thickened.
- Temper the yolks: slowly pour about half of the warm cream into the yolk mixture, whisking constantly to prevent curdling. This gentle introduction raises the yolks’ temperature gradually.
- Cook the custard base: Return the tempered yolk mixture to the saucepan with the remaining cream. Cook over low heat, stirring constantly with a wooden spoon or silicone spatula, until the custard thickens enough to coat the back of the spoon (around 175°F/80°C). Do not let it boil.
- Strain and chill: Pour the custard through a fine-mesh sieve into a clean bowl to remove the vanilla pod and any coagulated bits. Let cool at room temperature briefly, then cover with plastic wrap pressed directly on the surface to avoid a skin. Refrigerate for at least 4 hours or overnight for best results.
- Churn to silky perfection: Pour the chilled custard into your ice cream maker and churn according to the manufacturer’s directions until it reaches a soft-serve consistency (typically 25-30 minutes). Avoid over-churning to maintain creaminess and avoid grainy texture.
- Freeze to set: Transfer the ice cream to an airtight container and freeze for 2-3 hours to fully firm up before serving.
chef’s Notes: Tips for Success
- Vanilla Bean Selection: Choosing a plump, fragrant Madagascar or Tahitian vanilla bean elevates the flavor vastly over vanilla extract.If unavailable, use the highest-quality pure vanilla extract.
- Custard Care: Constant stirring and low heat are critical to prevent scrambling eggs. If unsure, use an instant-read thermometer to hit the custard’s “nappe” stage perfectly.
- Chilling Magic: Allowing the custard base to chill thoroughly before churning improves texture and prevents ice crystal formation.
- Make-Ahead: Prepare the custard base up to 2 days ahead and store tightly covered in the fridge. Churn fresh when ready for unrivaled creaminess.
- Dairy Alternatives: For lighter versions, substitute half-and-half for heavy cream-but expect a slightly less rich texture.
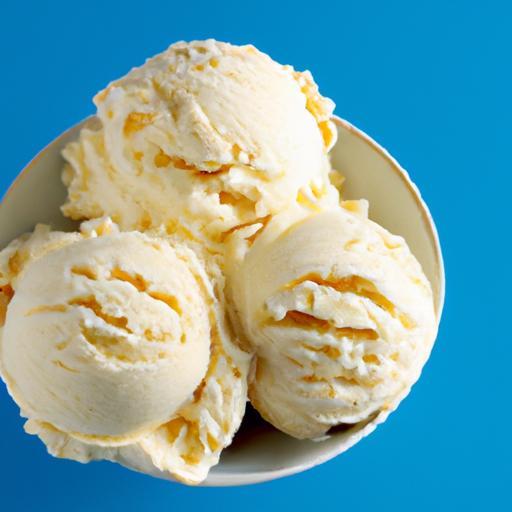
Serving Suggestions to Elevate Your Vanilla Ice Cream
Present your homemade treasure in elegant glass bowls or classic waffle cones lined with dark chocolate drizzle for contrast. Garnish with fresh seasonal berries like raspberries or blueberries, a sprig of mint, or a dusting of finely grated raw vanilla bean pods to amplify aroma. For a decadent twist, add a warm berry compote or sprinkle toasted almond slivers for crunch.

| Nutrient | Per Serving (¼ quart) |
|---|---|
| Calories | 340 |
| Protein | 5g |
| Carbohydrates | 30g |
| Fat | 22g |
For a deeper dive into ice cream science and techniques, check out the comprehensive guide on Serious Eats.
Looking for more frozen indulgences? Explore our Homemade Dairy Frozen Desserts Collection for recipes that complement your creamy vanilla masterpiece.
Q&A
Q&A: Crafting the Creamiest Homemade Vanilla Ice Cream Delight
Q1: What’s the secret to achieving irresistibly creamy vanilla ice cream at home?
A1: The magic lies in balancing rich, high-quality cream and whole milk with just the right amount of sugar and fresh vanilla beans. Incorporating eggs in a custard base adds silkiness, while careful churning ensures tiny ice crystals, giving that luscious, creamy texture.
Q2: Can I make vanilla ice cream without an ice cream maker?
A2: Absolutely! While an ice cream maker makes the process smoother, you can still craft creamy ice cream by stirring the mixture vigorously every 30 minutes as it freezes. Using a shallow, wide container helps speed up freezing and keeps texture smooth. Patience and consistent stirring are key!
Q3: Why use real vanilla beans rather of vanilla extract?
A3: Vanilla beans offer a deeper, more complex flavor with delicate floral notes. The tiny black seeds – called vanilla caviar – add a beautiful texture and visual appeal,setting homemade vanilla ice cream apart from store-bought versions.
Q4: How does tempering eggs improve the ice cream’s texture?
A4: Tempering gently warms eggs by slowly adding hot cream mixture before combining them fully, preventing curdling. This technique creates a silky custard base that thickens naturally, resulting in a creamier, richer ice cream with a smooth mouthfeel.
Q5: What role does sugar play beyond sweetness?
A5: Sugar not only sweetens but also lowers the freezing point of the mixture, preventing it from turning into a hard block of ice. This keeps the ice cream scoopable and soft, enhancing overall creaminess.
Q6: How can I customize my vanilla ice cream without losing its classic charm?
A6: Add subtle twists like a sprinkle of cinnamon or a hint of citrus zest during the custard phase. Another option is folding in mix-ins such as tiny chocolate chips, toasted nuts, or swirls of homemade caramel after churning, maintaining the vanilla essence while adding delightful contrasts.
Q7: What’s the best way to store homemade vanilla ice cream?
A7: Store it in an airtight container to prevent ice crystals forming and absorbing freezer odors. Pressing a piece of parchment paper directly on the surface before sealing helps keep it fresh and creamy for longer.
Q8: How crucial is ingredient temperature in making ice cream?
A8: Very critically important! Letting the custard chill thoroughly before churning ensures quicker freezing, which creates smaller ice crystals and a smoother texture. Patience in cooling sets the stage for perfection.Q9: Can I substitute ingredients to make it dairy-free and still achieve creaminess?
A9: Yes, plant-based creams like coconut or cashew cream can replace dairy, though the flavor and texture might differ slightly. Using a stabilizer like a small amount of xanthan gum or a natural thickener, coupled with proper churning, helps mimic customary creaminess.
Q10: What’s one common mistake to avoid when making vanilla ice cream at home?
A10: Skipping the chilling step before churning. Rushing this process results in larger ice crystals and a grainy texture. Taking the time to chill the custard overnight transforms your creation into a velvety dream that melts perfectly on the tongue.
Closing Remarks
As the final scoop melts on your tongue, you’ll realize that crafting the creamiest homemade vanilla ice cream is not just a recipe-it’s an experience.From selecting the freshest ingredients to patiently churning the mixture to perfection, every step is a labor of love that transforms ordinary cream and vanilla into a luscious, velvety delight. Armed with these tips and techniques, your kitchen can become a haven of sweet indulgence, where the timeless charm of homemade ice cream awaits at every turn. So go ahead, embrace the art of ice cream making, and let your taste buds revel in the simple, creamy magic of vanilla done right.