In the realm of desserts, few creations evoke as much admiration as a perfectly smooth, luscious cheesecake. Yet, the customary baking process-with it’s slow bake times and delicate water baths-often deters even the most enthusiastic home chefs. Enter the Creamy Instant Pot Cheesecake: a game-changing twist that transforms this classic indulgence into a swift delight, unveiling rich flavors and velvety textures in a fraction of the time. Harnessing the power of pressure cooking,this innovative approach not only simplifies the journey to cheesecake bliss but also ensures consistently flawless results. Join us as we dive into the secrets behind this creamy marvel and discover how the Instant pot redefines the art of dessert-making.
Choosing the Perfect Cream Cheese Blend for Ultimate Creaminess
Creamy Instant Pot Cheesecake: Quick Delight Unveiled begins with a thoughtful choice of cream cheese that sets the foundation for a velvety texture. While conventional full-fat blocks yield the richest results, blending them with a touch of softened cream cheese spread enhances smoothness without sacrificing flavor. Opt for brick-style cream cheese rather than the tubged type to avoid excess moisture, which can make yoru filling watery. The balance of firmness and softness in your cream cheese ensures the batter will be silky and stable throughout pressure cooking.
For the ultimate creaminess, start by letting the cream cheese rest at room temperature until wholly soft but not melting-this prevents lumps and creates a uniform batter. Incorporating a small amount of sour cream or heavy cream can further enhance silkiness and contribute a subtle tang that brightens the palate.
Step by Step Guide to Pressure Cooking Your Cheesecake to Perfection
- Prepare your crust: Press a mixture of finely crushed graham crackers,melted unsalted butter,and a hint of sugar evenly into the base of a 7-inch springform pan lined with parchment paper. Chill briefly to firm up.
- Blend the filling: Using a stand mixer or handheld whisk, beat the softened cream cheese with granulated sugar until perfectly smooth. Add vanilla extract, then one egg at a time, mixing gently to avoid incorporating air bubbles that cause cracking.
- Transfer filling carefully: Pour the batter over the chilled crust. Tap the pan lightly on the counter to release air pockets,ensuring an even surface.
- Set up the Instant pot: Pour 1 cup of water into the inner pot. Place a trivet with handles inside and gently lower the cheesecake pan onto it. Seal the lid and set the valve to “sealing.”
- cook on high pressure: Select Manual or Pressure Cook, and set time for 35 minutes. Once complete, allow a natural pressure release for 20 minutes to prevent sudden temperature changes that may crack the surface.
- Cool and chill: Remove the cheesecake pan carefully. Run a knife around the edges to loosen it,then chill uncovered for at least 4 hours or preferably overnight-this resting step solidifies the texture beautifully.
Top Toppings and Serving Suggestions to Elevate Your Instant Pot Creation
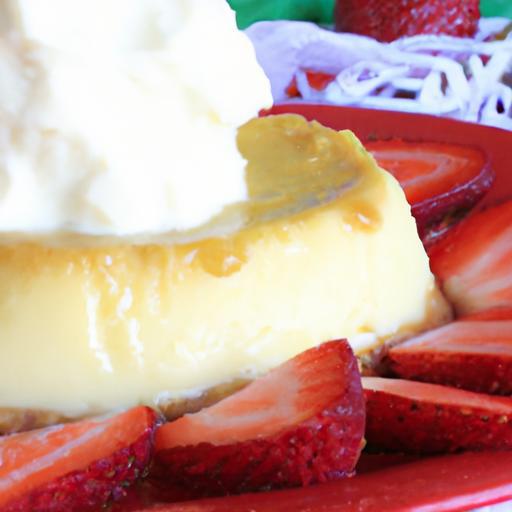
To complement this creamy Instant Pot cheesecake,think fresh,colorful,and textural contrasts. A spoonful of homemade mixed berry compote with raspberries, blueberries, and blackberries adds tart sweetness and vibrancy. For nutty crunch, sprinkle toasted pecans or finely chopped pistachios atop. A drizzle of premium honey or a dusting of cocoa powder intensifies richness without overpowering the delicate vanilla essence.
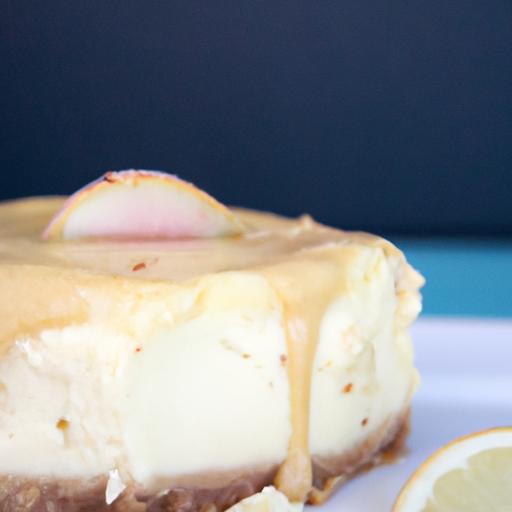
Serve slices on simple white plates to showcase the smooth surface and creamy interior. Add a sprig of fresh mint or edible flowers for a sophisticated touch. For an indulgent finish, accompany with a dollop of freshly whipped cream infused with a hint of lemon zest.
Prep and Cook Time
- Planning: 20 minutes
- Instant Pot cooking: 35 minutes
- Natural Pressure Release: 20 minutes
- Chilling: Minimum 4 hours (overnight recommended)
Yield
Serves 8 generous slices of luxurious cheesecake.
Difficulty Level
Medium - a rewarding technique for all home bakers ready to experiment with Instant Pot desserts.
Ingredients
- 1 ½ cups graham cracker crumbs (finely crushed)
- 5 tbsp unsalted butter, melted
- 2 tbsp granulated sugar (for crust)
- 24 oz cream cheese (brick-style, softened to room temperature)
- ¾ cup granulated sugar
- 1 tsp pure vanilla extract
- 3 large eggs (room temperature)
- ½ cup sour cream (optional for extra creaminess)
- 1 tbsp all-purpose flour (to stabilize the filling)
- 1 cup water (for Instant Pot base)
Chef’s Notes & Tips for Success
- Avoid overmixing: Incorporate eggs slowly and stop as soon as the batter looks smooth to prevent graininess.
- Water bath alternative: The Instant Pot acts like a water bath, providing gentle steaming that prevents cracking-don’t skip the water in the pot.
- Room temp ingredients: All dairy and eggs should be at room temperature for the silkiest texture.
- Make ahead: Cheesecake improves after resting; prepare a day in advance to serve chilled.
- Crust options: Swap graham crackers for gluten-free cookies or spiced gingersnaps for a unique twist.
Nutrition Information
| Nutrition | Per Serving |
|---|---|
| Calories | 330 kcal |
| Protein | 7 g |
| Carbohydrates | 28 g |
| Fat | 21 g |
Discover more instant Pot dessert recipes to keep your sweet tooth delighted.
For skincare and food safety guidelines for dairy, visit FDA Food Safety Modernization Act.

Q&A
Q&A: Creamy Instant pot Cheesecake – Quick Delight Unveiled
Q1: What makes Instant Pot cheesecake different from traditional oven-baked cheesecake?
A1: Instant Pot cheesecake is a game-changer because it uses steam pressure to cook the cheesecake gently and evenly. This method results in an ultra-creamy texture without the risk of cracks or drying out, all in a fraction of the time it takes in a conventional oven. plus, no water bath fuss!
Q2: How long does it typically take to prepare and cook a cheesecake in the Instant Pot?
A2: From start to finish, including prep and cooking, you can expect around 45 to 60 minutes. The cooking itself usually takes about 35 minutes under pressure, followed by a natural release and cooling. It’s perfect for whipping up a luscious dessert in less than an hour.Q3: can I customize the crust for my Instant Pot cheesecake?
A3: Absolutely! The classic graham cracker crust is a favorite, but you can get creative with digestive biscuits, crushed almonds, or even gluten-free crackers. Just mix crushed cookies with melted butter and press firmly into the pan. The Instant Pot’s gentle steam helps the crust set beautifully without the need for pre-baking.Q4: What tips ensure a perfectly creamy cheesecake texture every time?
A4: Key secrets are using room temperature cream cheese, blending ingredients smoothly, and avoiding overmixing once eggs are added.Also, make sure to cover your cheesecake pan tightly with foil to keep moisture in, and trust the natural pressure release for best results.
Q5: How do I know when the Instant Pot cheesecake is done?
A5: The cheesecake should have a slight jiggle in the center, similar to a custard. It will continue to set as it cools. If it’s to liquidy, you might need a few more minutes under pressure next time. Using a toothpick to test for doneness is less reliable as cheesecakes remain moist inside.
Q6: Can I add flavors or toppings to enhance my cheesecake?
A6: Definitely! Vanilla and lemon zest add brightness to the batter, while swirl-ins like berry purée or chocolate chips create delightful surprises. After cooking, a drizzle of caramel sauce, fresh fruit, or a dusting of powdered sugar can turn your cheesecake into a showstopper.
Q7: What’s the best way to store leftover Instant Pot cheesecake?
A7: Store your cheesecake in an airtight container in the refrigerator. It keeps well for up to 4-5 days. For longer storage, you can freeze individual slices wrapped tightly in plastic wrap and foil, thawing in the fridge before serving to preserve that creamy delight.
Q8: Is the Instant Pot cheesecake suitable for special dietary preferences?
A8: Yes! With a few ingredient swaps, you can tailor this recipe to fit gluten-free or lower-sugar diets. Such as, use gluten-free crackers for the crust and a sugar substitute that bakes well. Just keep an eye on texture changes and adjust as needed.
Enjoy unveiling the secret to tender, rich cheesecake that’s as quick as it is creamy-made possible by your trusty Instant Pot!
Insights and Conclusions
with its smooth texture and swift preparation, this creamy Instant Pot Cheesecake transforms the classic dessert into a weeknight wonder. by harnessing the power of the Instant Pot, you can savor a luscious slice without the usual wait or fuss. Whether you’re a seasoned baker or a curious novice, this quick delight invites you to indulge in creamy perfection with ease-making every bite a celebration of both flavor and convenience. So next time a cheesecake craving strikes, remember: your Instant Pot holds the secret to dessert bliss, unveiled in just moments.